

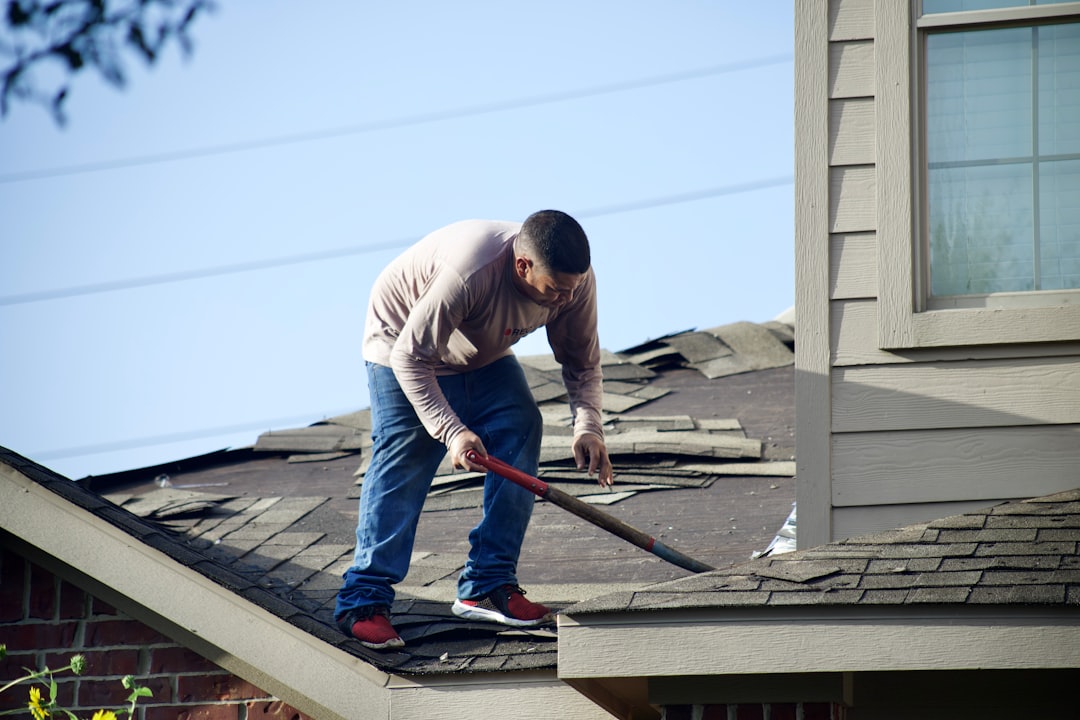
15 Jul DIY Shingle Roof Repair: Fix Cracks and Replace Missing Shingles
DIY Shingle Roof Repair: Fix Cracks and Replace Missing Shingles
What You Need to Know Before You Start a Shingle Roof Repair
At ClickCentric Digital, we specialize in helping local roofing contractors and home service businesses across West Michigan grow their online presence and connect with customers. To support both the homeowners searching for practical solutions and the local contractors who serve them, we have put together this complete guide to shingle roof repair.
Shingle roof repair is something most homeowners will face — often sooner than they expect. In fact, roofs commonly show their first signs of trouble around the 10–15 year mark, well before a 20 or 30-year warranty runs out.
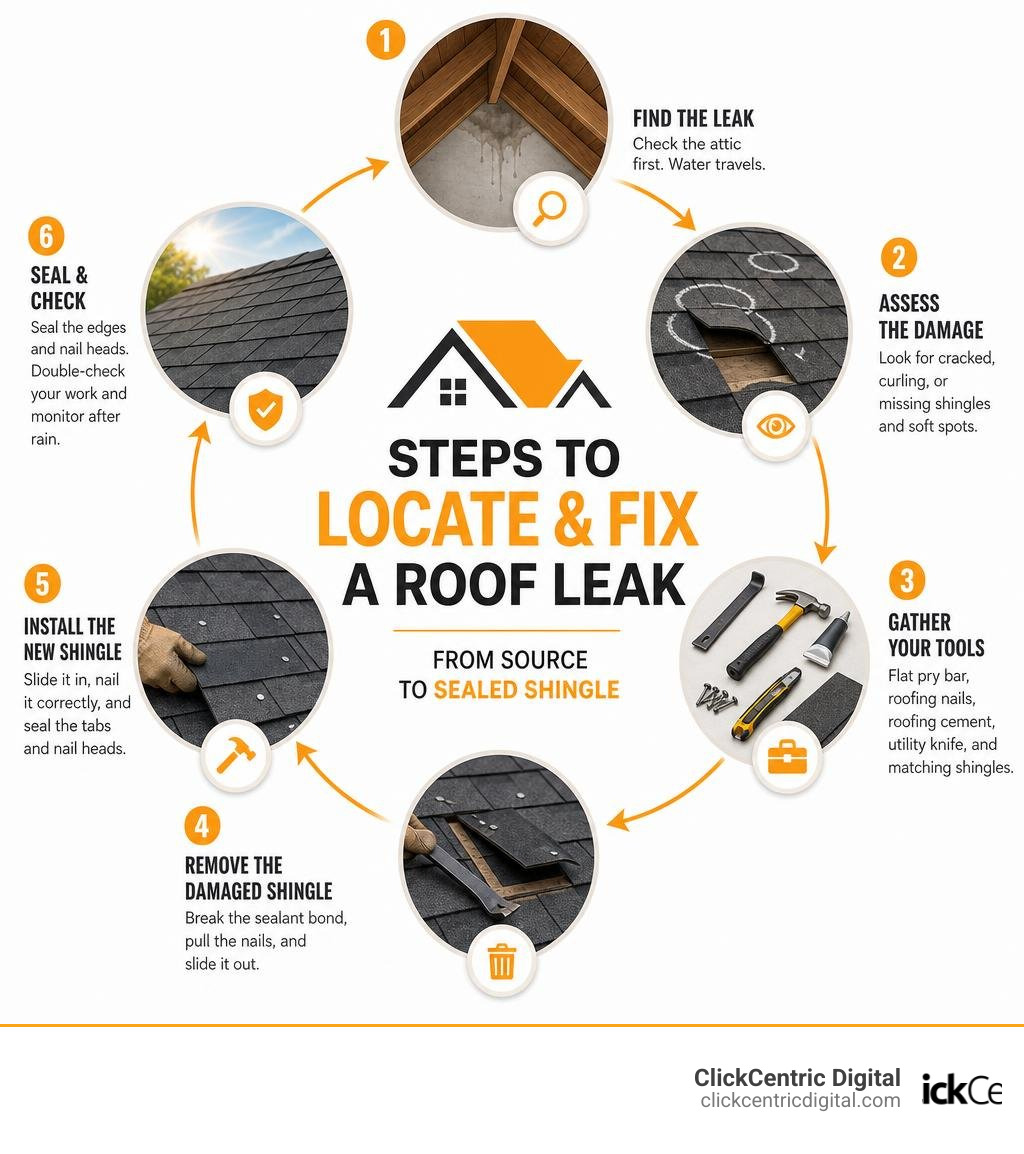
The good news? If the damage is small and your roof still has years of life left, fixing it yourself is very doable. Here is a quick answer to what this guide covers:
- Find the leak — Check the attic first. Water travels along rafters and can appear far from where it actually enters.
- Assess the damage — Look for cracked, curling, or missing shingles and check for soft spots on the deck.
- Gather your tools — You need a flat pry bar, roofing nails, roofing cement, a utility knife, and matching replacement shingles.
- Remove the damaged shingle — Break the sealant bond, pull the nails, and slide it out.
- Install the new shingle — Slide it in, nail it correctly, and seal the tabs and nail heads.
- Know when to stop — If shingles crack when you touch them or damage is widespread, call a pro.
A single missing or cracked shingle can cause thousands of dollars in water damage if left alone. But caught early, the repair costs as little as $10–$30 in materials and takes about an hour.
Only 14% of homeowners actually complete roof repairs themselves — but that doesn’t mean it’s out of reach. It just means preparation and safety matter more than most people think.
Learn more about shingle roof repair:
Common Causes of Damage and When to Choose Shingle Roof Repair
Asphalt shingles are the most widely chosen steep-slope roof covering in North America. They are durable, cost-effective, and highly modular. However, living in West Michigan means our roofs endure a gauntlet of weather extremes. From blistering Grand Rapids summers to heavy lake-effect snowstorms in Holland and Grand Haven, your roof takes a beating.
Over time, this continuous exposure leads to wear and tear. Understanding what causes this damage helps you decide if a simple shingle roof repair is enough, or if it is time to look at a full replacement.
Why Asphalt Shingles Fail
Several environmental factors work together to degrade your roof over its lifespan:
- Wind Damage: High winds can lift shingle tabs, breaking the manufacturer’s self-sealing adhesive strip. Once the seal is broken, the shingles flutter in the wind, eventually creasing, cracking, or tearing away completely.
- UV Degradation and Thermal Cycling: The sun’s ultraviolet rays dry out the asphalt oils in the shingles, causing them to become brittle and lose their protective mineral granules. This is accelerated by thermal cycling—the rapid heating and cooling of the roof deck during West Michigan’s seasonal transitions.
- Failed Flashing and Pipe Boots: Not every leak is a shingle problem. Flashing details around chimneys, dormers, and valleys carry the highest leak risk per square foot. Additionally, standard rubber pipe boots bake in the sun and typically crack or dry rot within 7 to 10 years, long before the shingles themselves fail.
To help you decide whether to roll up your sleeves for a DIY fix or start planning for a new roof, consult the comparison table below:
| Feature / Condition | Choose Shingle Roof Repair | Choose Full Roof Replacement |
|---|---|---|
| Scope of Damage | Isolated to a few shingles (1 to 3 tabs) | Widespread cracking, curling, or missing shingles across multiple slopes |
| Roof Age | Under 12–15 years old | Over 15–20 years old, approaching end of service life |
| Decking Condition | Solid, dry, and structurally sound | Soft spots, sagging areas, or widespread wood rot |
| Shingle Flexibility | Surrounding shingles are pliable and bend without cracking | Surrounding shingles are brittle and break when handled |
| Granule Loss | Minimal or localized | Heavy accumulation of granules filling up gutters and downspouts |
| Estimated Cost | $10 – $30 (DIY); $300 – $600 (Professional) | Thousands of dollars, depending on square footage |
According to the Asphalt Roofing Manufacturers Association’s TECHNICAL BULLETIN, asphalt shingle roofs are highly repairable. Most components can be serviced independently without disrupting the surrounding field.
If you are dealing with isolated storm damage on an otherwise healthy roof, executing a targeted repair is highly economical. For a deeper dive into managing these home expenses, check out The Ultimate Guide to Affordable Roof Repair and Saving Your Shingles.
How to Safely Locate and Assess a Roof Leak
Before you climb a ladder, you have to find the source of the problem. Water is incredibly sneaky—it rarely travels in a straight line. It enters through a breach in the shingles or flashing, runs laterally along a rafter, hops over a layer of insulation, and finally drips through your ceiling ten feet away from the actual roof leak.
To find the exact entry point without putting yourself in danger, we recommend a “water detective” approach starting from inside your home.
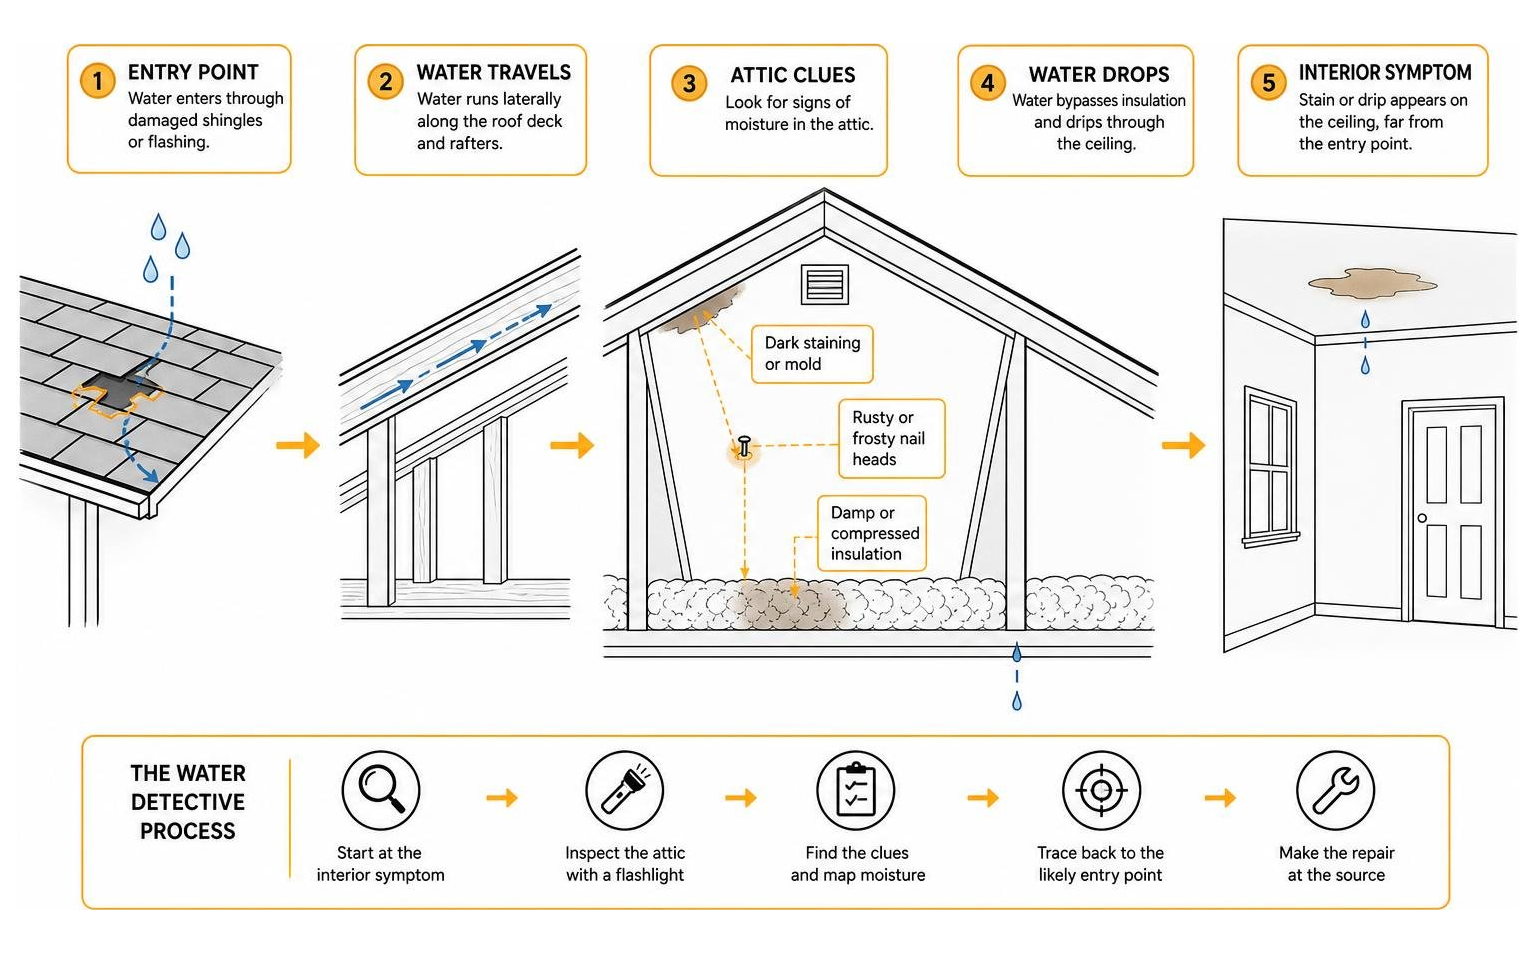
Step 1: The Attic Inspection and Moisture Mapping
Wait for a rainy day or head up to your attic with a high-powered flashlight. Look for:
- Dark water staining or mold on the underside of the plywood roof deck.
- Damp or compressed insulation.
- “Rusty” or frosty nail heads protruding through the decking.
Step 2: The Compass and Rare-Earth Magnet Trick
If you find a wet spot in the attic but are having trouble translating that exact location to the top of your roof, try this clever DIY trick:
- Take a strong rare-earth magnet and tape it to the underside of the roof deck directly at the highest point of the wet stain.
- Head up onto the roof with a standard magnetic compass.
- Walk slowly over the suspected area. When the compass needle spins wildly, you are standing directly over your attic magnet—and your leak source.
Step 3: Ladder and Roof Safety Best Practices
Roofing is inherently dangerous. Falls from residential roofs account for thousands of emergency room visits each year. Always follow these safety rules:
- Check the Pitch: Never walk on a roof steeper than a 6:12 pitch without a professional fall-protection harness and safety rope.
- Wear the Right Gear: Wear soft-soled, high-traction rubber shoes, safety glasses, and heavy-duty work gloves (roofing cement is incredibly messy and sticky).
- Set Your Ladder Properly: Ensure your extension ladder is on stable, level ground and extends at least three feet above the roof edge. Secure it at the top if possible.
- Pick Your Weather: Never work on a wet, icy, or frosty roof.
The Step-by-Step Shingle Restoration Process
Once you have identified the damaged area and confirmed it is safe to proceed, you can begin the physical repair. The ideal weather window for a shingle roof repair is a mild, dry day between 60°F and 80°F. If it is too cold, asphalt shingles become stiff and brittle, cracking easily when you lift them. If it is too hot (above 85°F), the shingles soften, making them easy to tear, and the self-sealing adhesive becomes incredibly sticky and difficult to work with.
Essential Tools and Materials for Shingle Roof Repair
Before climbing up, assemble your toolkit so you do not have to make multiple trips up and down the ladder.
- Flat Pry Bar (Wrecking Bar): Essential for breaking the adhesive seals and pulling nails.
- Hammer: A standard claw hammer or specialized roofing hammer.
- Utility Knife: Equipped with a hook blade for clean, easy cuts through asphalt.
- Roofing Nails: 1-1/4 inch hot-dipped galvanized roofing nails for rust resistance.
- Asphalt Plastic Roofing Cement: To seal down tabs and patch small tears.
- Underlayment Patch: A small piece of 30# (thirty-pound) asphalt-saturated felt (tarpaper).
- Replacement Shingles: Matched to your existing roof’s style and color.
For detailed specifications on material selection, you can refer to the How to Replace Damaged Shingles | Step-by-Step DIY Guide | Roofs Wiki.
Step-by-Step Guide to DIY Shingle Roof Repair
Replacing a shingle requires disturbing the courses immediately surrounding it. Because shingles overlap, a standard three-tab shingle is actually secured by two rows of nails: four nails in its own nail line, and another four nails from the course directly above it. That means you must locate and remove up to eight nails to free a single shingle.
Follow this systematic seven-step replacement process:
Step 1: Break the Seal on the Damaged Shingle
Slide your flat pry bar gently under the tabs of the damaged shingle to break the manufacturer’s adhesive seal. Work slowly to avoid tearing the surrounding shingles.
Step 2: Break the Adjacent Seals
You must also break the adhesive seals on the course of shingles directly above the damaged one. This gives you the clearance needed to access the hidden nails.
Step 3: Locate and Extract the Nails
Gently lift the shingle tab above the damaged shingle. You will see the nail line. Slide your flat pry bar under the damaged shingle, centering it around a nail, and pry upward. This lifts the nail head slightly.
Pro Tip: If the nails were driven deeply by a pneumatic nailer and are hard to pry up from the top, head back into the attic. Use a hammer to tap the tips of the target nails upward from below. This will push them up about 1/4 inch on the roof, making them incredibly easy to pull with your pry bar.
Step 4: Remove the Overlying Nails
The nails from the course above also penetrate the top edge of your damaged shingle. Lift those upper tabs and extract those nails as well.
Step 5: Slide Out the Old Shingle and Inspect the Deck
With all eight nails removed, slide the damaged shingle out. Take this opportunity to inspect the exposed underlayment and wood deck. If you find soft, rotting, or delaminated plywood, stop here—the decking must be cut out and replaced before installing new shingles.
Step 6: Slide in the New Shingle and Nail It Down
Slide your new matching shingle into the vacant slot, aligning its bottom edge perfectly with the adjacent shingles.
Using 1-1/4 inch galvanized nails, drive four new nails along the designated nail line (usually about an inch above the exposure cutouts and an inch in from each side edge). Drive the nails flush. Avoid under-driving (which leaves protruding nail heads that puncture overlapping shingles) or over-driving (which cuts into the shingle and reduces wind resistance).
Step 7: Reseal the Tabs
Apply three spots of roofing cement (about the size of a quarter) under each tab of the new shingle using your caulk gun or putty knife. Press the tabs down firmly. You should also apply a dab of cement over any exposed nail heads from the course above that you had to pull and replace.
For visual references and additional tips on this physical process, you can consult the guide on How To Repair and Replace Roof Shingles for Your Home – This Old House.
Advanced Repair Techniques: Flashing, Underlayment, and Cracks
Sometimes, a full shingle replacement is unnecessary, or the leak is originating from a supportive component like the flashing or underlayment.
Handling Underlayment Tears
If you accidentally tear the underlayment felt while prying up old shingles, do not just cover it up. Cut a small square of 30# tarpaper. We prefer 30# felt over 15# felt because it is stiffer, tougher, and much easier to slide smoothly under the existing, undamaged layers of underlayment. Slide the patch upward so it mimics the natural water-shedding overlap, and secure it with a thin layer of roofing cement.
Repairing Minor Cracks Without Replacement
If a shingle has a clean, hairline crack but is otherwise in excellent condition, you can repair it without replacing the whole piece:
- Lift the cracked tab gently and apply a bead of roofing cement directly under the crack.
- Press the shingle down flat.
- Apply a thin layer of roofing cement over the top of the crack, smoothing it with a putty knife.
- The Texture-Matching Trick: Go down to your gutters and scoop up a handful of loose mineral granules that have washed down over time. Sprinkle these granules directly onto the wet roofing cement on your patch. Press them in gently. This protects the cement from UV damage and makes the repair virtually invisible from the ground!
Addressing Flashing and Valley Details
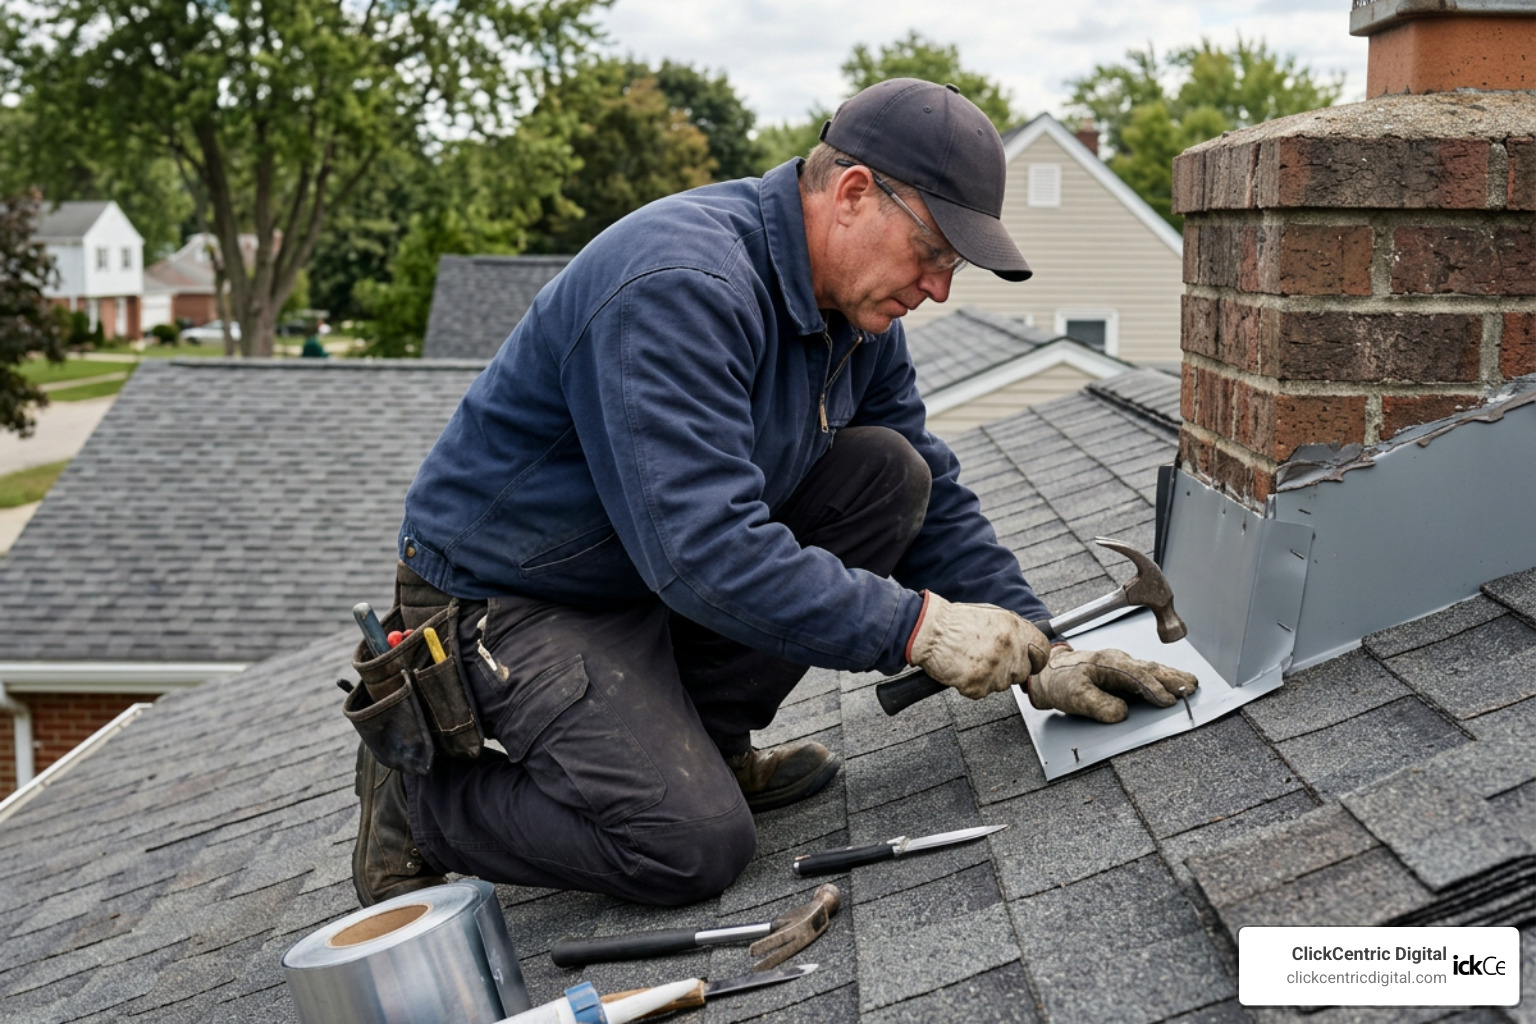
Valleys and step flashing are critical water-delivery paths. If you notice leaks around a valley or chimney, it is often due to cracked sealant or rusted metal. While minor gaps in step flashing can be temporarily sealed with high-temp silicone or roofing cement, compromised valley metal or heavily corroded flashing must be completely replaced.
Because these areas rely on precise layering to shed water, improper DIY repairs here often make leaks worse. For a regional perspective on weatherproofing these high-risk areas in damp climates, check out A Homeowner’s Guide to Repairing Roof Shingles in Western Washington.
Frequently Asked Questions About Roof Maintenance
Keeping your roof in top shape is an ongoing process. Routine preventative maintenance can extend your roof’s life by years and save you from costly emergency repairs. We recommend performing a visual roof inspection twice a year—once in the spring and once in the fall.
- Clean Your Gutters: Clogged gutters cause water to back up under the eave shingles, leading to fascia rot and ice dams in the winter.
- Remove Debris: Keep the roof surface free of accumulated leaves, pine needles, and branches, which trap moisture and accelerate shingle decay.
- Gently Clean Moss and Algae: If you have moss growing on shaded sections of your roof, apply a roof-safe cleaner. Never use a pressure washer, as the high-pressure stream will instantly strip the protective granules off your shingles.
How do you match replacement shingles to an older roof?
Matching replacement shingles to an older roof is one of the biggest aesthetic challenges homeowners face. Even if you buy the exact same brand and color name, the old shingles on your roof have been exposed to years of sunlight, UV radiation, and weathering, causing them to fade.
- Use Leftovers First: Check your garage, basement, or shed. Builders often leave a partial bundle of shingles behind after the initial installation. These are your best match because they are from the same manufacturing batch.
- Take a Physical Sample: If you do not have leftovers, carefully remove a damaged piece or a clean tab and take it to a local building supplier. Matching a physical sample under natural sunlight is far more accurate than trying to match a photo on your smartphone.
- Understand Aesthetic Blending: That new shingles may initially look darker or richer than the surrounding roof. Over several months, exposure to the sun and weather will help the new materials blend in. For more details on aesthetic matching, see How to Fix a Damaged Roof Shingle.
What are the most common mistakes to avoid during a DIY repair?
A bad repair can sometimes cause more damage than the original leak. When tackling a shingle roof repair, avoid these common mistakes:
- Over-Applying Sealant: Many homeowners believe “more is better” when it comes to roofing cement. In reality, giant globs of caulk or tar can trap water behind them, creating a dam that forces water upward and under the shingles. Use sealant sparingly.
- Improper Nail Placement: Nails must be driven straight and flush. If you drive them too high, they miss the lower shingle entirely. If you drive them too low, they remain exposed to the elements, creating a direct path for water to rust the nail and rot the deck.
- Failing to Fix the Root Cause: Patching a shingle over a soft, rotting spot of plywood decking is a temporary fix that traps moisture, leading to structural wood rot and mold growth. Always inspect the deck.
- Using the Wrong Materials: Never use standard household silicone caulk on shingles. It cannot withstand the extreme thermal expansion and UV exposure of a roof deck. Always use dedicated asphalt plastic roofing cement.
Review our Accurate Roof Bid Checklist: How to Avoid Costly Estimating Blunders to understand the technical standards professional roofers use to avoid these issues.
When should I stop patching and hire a professional roofer?
While replacing a couple of damaged shingles is a great weekend project, there is a point where DIY repairs become a waste of time and money. You should stop patching and call a professional under the following circumstances:
- The “Brittle” Test Fails: If you attempt to lift a surrounding shingle to make a repair and it cracks or breaks in your hand, your shingles have reached the end of their service life. The roof is too brittle to repair, and any work you do will simply create new leaks.
- Widespread Damage: If you have more than three or four damaged areas, or if shingles are curling and losing granules across multiple slopes, a full roof replacement is required.
- Structural Rot: If your attic inspection reveals sagging rafters, widespread mold, or soft, spongy decking, the roof requires structural restoration.
- Complex Roof Elements: Leaks occurring in valleys, around skylights, or near complex chimney flashing are highly technical and should be handled by an experienced professional.
If you are located in West Michigan, there are several highly rated, local roofing professionals available to help. You can read the comprehensive Shingle Roofing Repair Guide (2026) to see how professional repairs are scoped.
For reliable local services, you can explore Allied Roofing Company or look into Horizon Roofing in Holland, MI. Homeowners in Grand Rapids and the lakeshore can consult West Michigan Roofing or check out local reviews on Yelp for Holland, MI. If you are further north or south along the coast, Above Roofing in Grand Haven and Mighty Dog Roofing in South Haven offer excellent repair services. You can also find certified contractors in your neighborhood through Owens Corning in Kalamazoo.
Conclusion
Taking care of your home’s roof is one of the most important aspects of protecting your overall property investment. Whether you decide to tackle a minor shingle roof repair yourself or hire a qualified West Michigan contractor, catching damage early is the key to avoiding catastrophic water damage.
For business owners, maintaining commercial properties requires the same proactive approach. To learn more about protecting your commercial assets, read our guide on Commercial Roof Repair and Maintenance: Protecting Your Business Investment.
At ClickCentric Digital, we understand that running a successful local business—whether you are a roofer in Grand Rapids, a retail shop in Holland, or a service provider in Kalamazoo—requires a steady stream of qualified customers. We specialize in helping local businesses improve their search rankings, manage online reviews, and build high-converting local marketing campaigns.
If you want to grow your local presence and acquire more customers in West Michigan, let us handle your digital marketing. Grow your local business with paid traffic management and search engine optimization designed specifically for your target market.
Sorry, the comment form is closed at this time.